Challenge: The Red Force's Penetrating Strategy: Rook's Breakthrough and Cannon's Sudden Surge – Lessons from a Level 5/10 Position - Can you solve it?
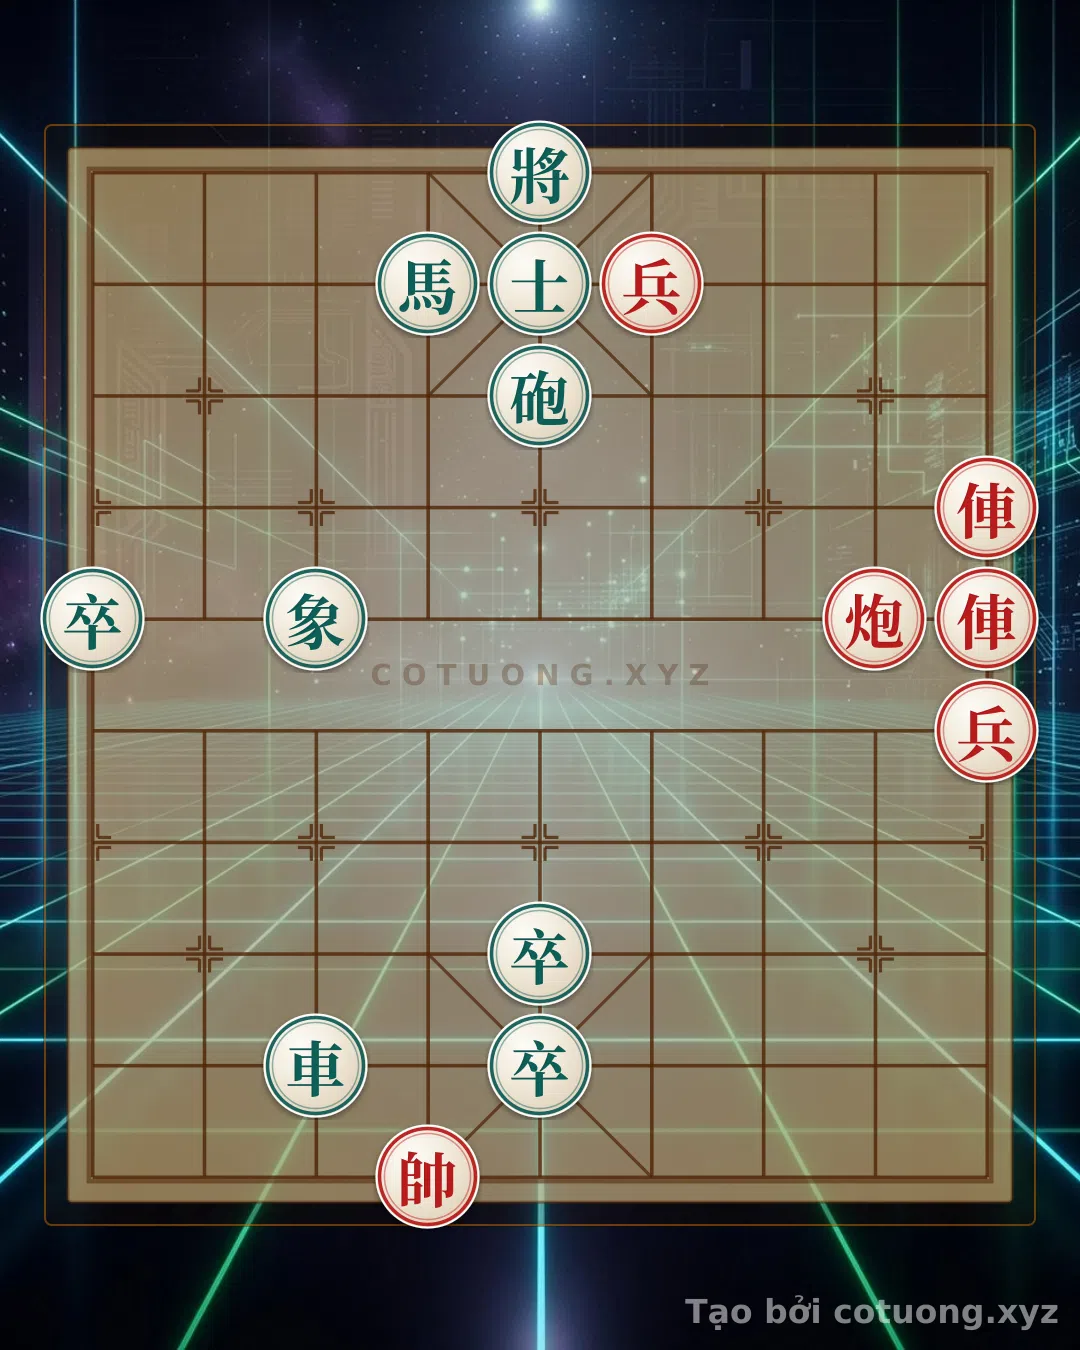
This is a tricky position for the Red side, where the rook on file 1 is deeply penetrating into the Black's defensive zone, while the cannon on file 2 creates unexpected pressure on the central column. The article analyzes how the Red side defends the key point and prepares for a counterattack as the position is about to undergo a sudden shift. Understanding these coordinated moves will help you overcome defensive weaknesses and seek precise attacking opportunities.
COTUONG.XYZ